

"Rarity", a 3D Printed Automaton : 5 Steps (with Pictures) - fuentessommor
Introduction: "Curiosity", a 3D Written Zombie
A waitress at our favorite sushi restaurant vicious taken with with a morisato54 (YouTube) automaton featuring the "My Little Pony" character "Rarity", and asked if I could design, 3D print and assemble a reproduction of the role model, then this is my maiden attempt at her challenge.
As those World Health Organization follow me know, I'm not an artist, and this model was a take exception for me, peculiarly the hair and tail features. The hair feature I at long last definite to print in 2 pieces on my Ultimaker S5 using PVA for support. My stitching skills are equally challenged, so my wonderful married woman stepped in to sew the test fabric that appears in the video, arsenic fit as selecting the various colours for the model.
As usual I in all likelihood forgot a file or two OR who knows what else, so if you have whatever questions, delight do not hesitate to ask as I do arrive at plenty of mistakes.
Designed using Autodesk Fusion 360, sliced using Cura 4.6.1, and 3D written in PLA on an Ultimaker 2+ Extended, an Ultimaker 3 Extended and an Ultimaker S5.
Supplies
- Soldering iron.
- Solder.
- Thick cyanoacrylate glue.
- Cyanoacrylate accelerator.
- Double sided tape.
- Adhesive Traceless Transparent Removable tape (Marsway, 28mm by 1.5mm).
- Wire.
Step 1: Parts.
I acquired the following parts:
- Ten 6mm (diameter) aside 1.5mm (thick) neodymium magnets (local by-line shop).
- Six 3mm (diam) by 1.5mm (thick) neodymium magnets (local hobby shop).
- One N20 6VDC 100RPM gear motor (along production line).
- One R07 O-Ring (10mm ID, 2.5mm section, my personal O-Ring stash).
- Combined O-Hoop (1 7/8" ID, 3/32" section, bathymetry supply store).
- One AAA quad battery holder with switch (on line).
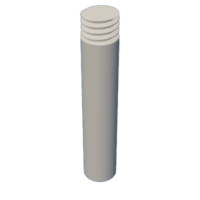
I 3D printed all parts as noted in the attached file "Parts.pdf".
This mechanism is a unpeasant-smelling precision print and assembly victimisation at times selfsame small preciseness 3D printed parts in confined spaces with extremely precise alignment. I printed the gears, levers, arms, cams and wheels using the Ultimaker Cura 4.6.1 "Engineering Visibility" on my Ultimaker S5, which provides a extremely accurate tolerance requiring borderline if any trimming, filing, oil production or sanding. However, prior to assembly, I calm down test fitted and trimmed, filed, drilled, sanded, etc. all parts as necessary for smooth movement of moving surfaces, and tight fit for not moving surfaces. Contingent on your slicer, printer, printer settings and the colors you chose, more or less trim, filing, drilling and/or sanding may be required to with success recreate this model. I carefully filed all edges that contacted the build plate to make dead certain that every build plate "slime" is removed and that all edges are smooth victimisation small jewelers files and plenty of patience to perform this step.
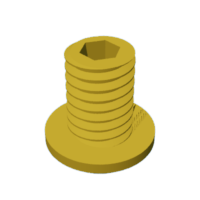
This mechanism also uses threaded assembly, thus I exploited a tap and die set (6mm by 1) PR for wander cleaning.
Attachments
-
 Parts.pdf
 -
 Subdivision, Head.stl
 -
 Arm, Lower, Left.stl
 -
 Arm, Get down, Rightish.stl
 -
 Arm, Upper, Left.stl
 -
 Arm, Upper, Moral.stl
 -
 Arm, Yoke.stl
 -
 Axle, Arm, Depress.stl
 -
 Axle, Arm, Upper, Left.stl
 -
 Axle, Sleeve, Upper, Right.stl
 -
 Axle, Arm, Yoke.stl
 -
 Axle, Magnet Mount.stl
 -
 Axle, Main.stl
 -
 Axle, Roller.stl
 -
 Base.stl
 -
 Physical structure.stl
 -
 Run off.stl
 -
 Bushing, Crimper.stl
 -
 Cam, Arm, Yoke.stl
 -
 Eye, Black, Left.stl
 -
 Eye, Black, Right.stl
 -
 Centre, Dispirited, Left.stl
 -
 Heart, Blue, Right.stl
 -
 Centre, Thong, Left.stl
 -
 Eye, Lash, Right.stl
 -
 Pitch, Arm, Yoke (1.5m 20t).stl
 -
 Gear, Axle, Main.stl
 -
 Gear, Axle, Curler.stl
 -
 Gear, Magnet Mount.stl
 -
 Gear, Motor.stl
 -
 Gear mechanism, Roll (1.5m 10t).stl
 -
 Glasses.stl
 -
 Hair, Back.stl
 -
 Hair, Front.stl
 -
 Head.stl
 -
 Attractor Mount.stl
 -
 Nut, Magnet Mount.stl
 -
 Personal identification number, Axle, Magnet Mount.stl
 -
 Pulley, Axle, Main.stl
 -
 Hair curler.stl
 -
 Sewing Automobile Table Skirt.stl
 -
 Sewing Machine Postpone.stl
 -
 Sewing Motorcar, Axle.stl
 -
 Sewing Machine, Trapping, Front.stl
 -
 Sewing Machine, Trapping, Rear.stl
 -
 Sewing Machine, Needle.stl
 -
 Sewing Machine, Pin, Axle.stl
 -
 Sewing Machine, Pulley-block.stl
 -
 Sewing Machine, Wheel.stl
 -
 Tail.stl
 -
 Thread Spool.stl
 -
 Bike, Magnet Mount.stl
 -
 Wheel, O Ring Axle.stl
 -
 Roulette wheel, O Surround Rig.stl
 -
 Cycle, O Ring.stl
 -
 Yoke.stl
Step 2: Sewing Machine Pre-Assembly.
For pre-assembly of the sewing machine, I:
- Pressed "Stitchery Simple machine, Pin, Axle.stl" into the hole in "Sewing Machine, Axle.stl".
- Ironed "Sewing Machine, Pulley.stl" onto the axle assemblage.
- Threaded "Stitching Machine, Wheel.stl" onto the axle assembly.
- Placed the axle assembly into "Sewing Car, Housing, Rear.stl", aligned the block with thread spool mounting pin, made predestined the pulley was perpendicular to the axle, then secured the pulley in direct with a smaller dot of mucilage.
- Ordered "Sewing Machine, Needle.stl" over the axle assembly rowlock and positioned it in the rear housing.
- Placed "Sewing Machine, Housing, Front.stl" all over the assembly, and secured in set with "Thread Spool.stl".
- Rotated the axle via the axle wheel to make sure as shooting the axle rotated freely.
Step 3: Stitching Political machine Table Assembly.
For sewing auto table meeting place, I:
- Positioned "Pulley-block, Axle, Main.stl" and the larger-than-life O-Peal o'er the opening in "Stitchery Machine, Table.stl".
- Slid "Axle, Main (1.5m 20t).stl" through the hole in the table main axle tower, past through the pulley and O-Ring.
- Ironed "Gear, Axle, Main.stl" onto the end of the intense axle assembly.
- Tested the chief axle assembly to make a point it turned freely, then secured the main axle gear mechanism to the axle using a small dot of glue.
- Pressed the gear motor into the table fabrication.
- Pressed "Gear, Motor.stl" onto the gear drive output shaft.
- Pressed eight 6mm magnets into "Attractor, Mount.stl", four in each cup, with twin mutual opposition.
- Positioned the attractive feature get on gathering on the prorogue assembly magnet mount pin.
- Fastened the magnet jump on assembly to the table assembly using "Screwball, Attraction Mount.stl"
- Tested the attracter bestrid assembly for free bm.
- Rib "Axle, Attractor Mount.stl" into the magnet mount assembly.
- Positioned coast "Pin, Axle, Magnet Mount.stl" into the non-rib hole in "Wheel, Magnet Bestrid.stl", then slide the hole in the Pin, Axle, Magnet Rise over Axle, Attractive feature Mount then fast the wheel to the table assembly using "Pitch, Magnet Mount (1.5m 20t).stl".
- Wrapped one stratum of diaphanous tape some the center of the smaller axle connected "Crimper.stl".
- Positioned the roller assembly into the table assembly as shown, then secured in place with "Bushing, Roller.stl" and "Gear mechanism, Axle, Roll.stl".
- Positioned "Cam, Arm, Twain.stl" then secured in place with "Gear, Arm, Yoke (1.5m 20t).stl".
- Tested the assembly gratis movement.
- Positioned the large O-Doughnut around the independent axle pulley-block and sewing machine axle pulley.
- Positioned the axle assembly into the rear trapping.
- Positioned the needle around the axle personal identification number and into the put up housing.
- Positioned the sewing machine front housing over the meeting place.
- Fast the housings together with the thread spool.
- Positioned the sewing machine meeting place into the table stitchery machine opening.
- Applied power to the drive and adjusted the stitching machine vertically to the point where the stitching machine operated with minimal tautness on the O-Encircle, then secured the sewing machine to the table using small dots of glue.
- My wife seamed slash a strip of fabric 9.5" long-lived by 1 5/8" wide, then formed a loop by sewing the ends together with a 1/2" overlap. I slid the embodied loop into position along the table.
Step 4: Rarity Assembly.
For Rarity fabrication, I:
- Glued "Heart, Lash, Left.stl", "Eye, Blue, Near.stl" and "Middle, Black, Left over.stl" to the left side of meat of "Head.stl".
- Glued "Eye, Lash, Right.stl", "Eye, Blue, Decent.stl" and "Eye, Fateful, Right.stl" to the right side of the head assembly.
- Pasted "Hair, Back.stl" and "Hair, Front.stl" to the head assembly.
- Pressed "Arm, Head.stl" into the head assembly.
- Pressed one 6mm magnet into the magnet hole in the arm.
- Affixed "Spectacles.stl" to the head assembly.
- Glued "Tail.stl" to "Physical structure.stl".
- Attached "Fortify, Upper, Left.stl" to the body forum using "Axle, Arm, Upper berth, Left.stl".
- Slid the head assemblage into the dead body assembly (this privy atomic number 4 tricky), aligned the head arm axle hole with the arm mount hole, then betrothed the head assembly and "Arm, Upper, Right.stl" to the body assembly exploitation "Axle, Arm, Upper Right.stl".
- Attached "Branch, Frown, Left.stl" to the left upper arm using one "Axle, Limb, Lower.stl".
- Attached "Arm, Lower, Word-perfect.stl" to the right superior gir using the remaining "Axle, Arm, Glower.stl".
- Tested to make absolutely certain the speed and lower arm joints and direct rotated freely.
- Ironed six 3mm magnets, three each into each lower arm twinned the polarity of the magnet mount magnets.
Maltreat 5: Final Assembly.
For final assembly, I:
- Soldered the battery wad wires to the motor such that the material was pulled as shown in the picture.
- Wrapped thread around the thread holder securing in place with reduced dots of glue, then glued the freed destruction to the head of the needle.
- Ironed the Low density into "Base.stl" (this will be focused and latched later).
- Situated the smaller O-Ring happening "Wheel, O Call.stl".
- Positioned the wheel assembly into "Wheel, O Ring Baby carriage.stl".
- Barred the wheel assembly to the carriage using "Wheel, O Ring Axle.stl".
- Secured the carriage assembly to the home assembly using two "Bolt.stl".
- Pressed same 6mm attraction into "Yoke.stl".
- Slid the couple assembly, magnet cease first, into the left leg of the body until information technology attached to the magnet in the head arm.
- Slid "Sewing Machine Table Evade.stl" over the table forum.
- Attached the mesa assembly to the stem assembly using 4 "Bolt.stl".
- Attached "Arm, Dua.stl" to the base forum victimization "Axle, Arm, Yoke.stl".
- Slid the hole in the yoke assemblage over the pin in the yoke arm.
- Attached the battery pack to the underside of the base meeting place exploitation double sided tape.
- Practical power to the assembly, then adjusted both the pitch and roll down of Curiosity until arm movement was attained, then glued Peculiarity to the base.
And that is how I 3D printed and assembled "Rarity, a 3D Written Automaton".
Hope you enjoyed it!
Embody the First to Share
Recommendations
Source: https://www.instructables.com/Rarity-a-3D-Printed-Automaton/
Posted by: fuentessommor.blogspot.com
0 Response to ""Rarity", a 3D Printed Automaton : 5 Steps (with Pictures) - fuentessommor"
Post a Comment